Settings in the Kirby Panel
Whether you’re setting up a contact form or customizing your email notifications, these options give you full control over how emails are sent and how users interact with the forms on your site.
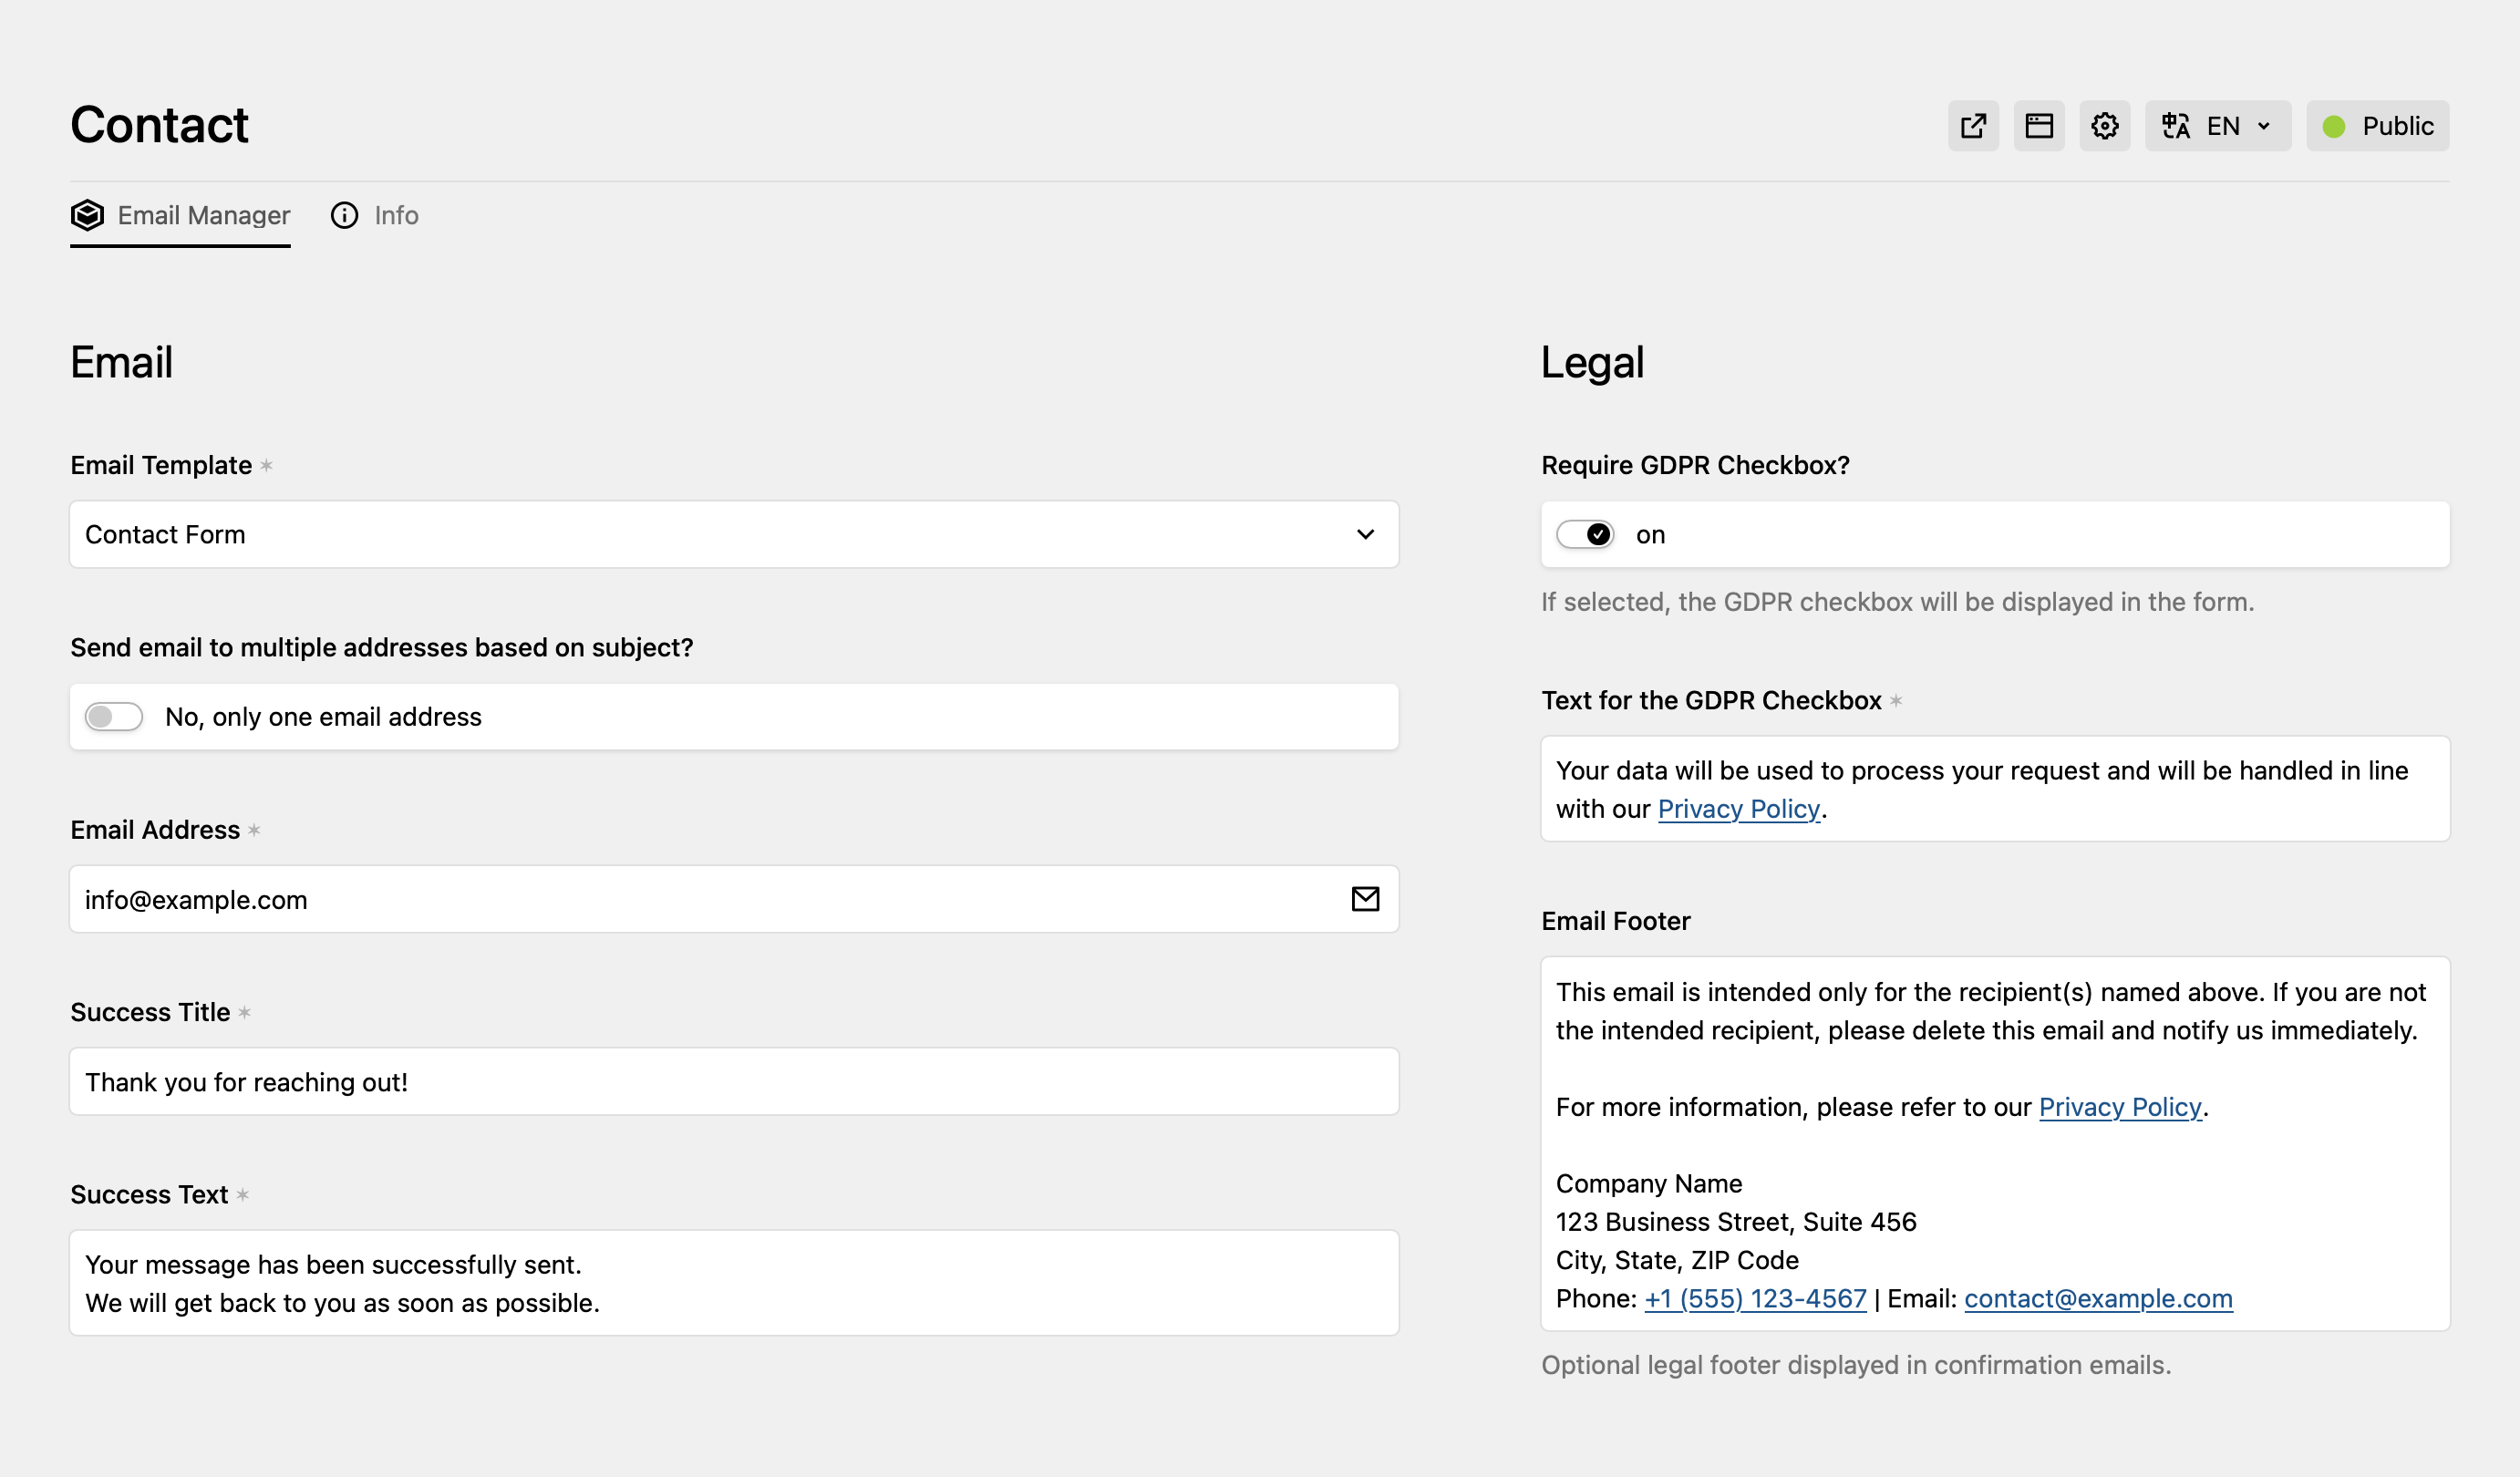
Email Template Selection
The first option you’ll encounter is the Email Template dropdown. This allows you to choose which email template will be used for the form submission. The selected template will determine how the email is structured when it’s sent to the recipient. For example, you may choose a “Contact Form” template or any other template you’ve configured. This flexibility makes it easy to use predefined templates or create custom ones based on your needs.
Send Email to Multiple Addresses Based on Subject
By toggling the “Send email to multiple addresses based on subject?” setting, you can decide whether form submissions should be directed to multiple email addresses based on the user’s subject selection.
- Single email address (default): The email will be sent to one predefined address, regardless of the subject.
- Multiple email addresses: When enabled, a subject selection dropdown will appear on the form. Users can choose the subject of their message (e.g., Support, Sales, Feedback), and the email will be sent to the respective email address associated with that subject.
Email Address
In the Email Address field, you specify the default email address that will receive the form submissions. When the “Send email to multiple addresses” option is enabled, you can add more email addresses linked to different subjects. This helps you route the emails to the correct department or person based on the user’s input.
Success Title
The Success Title is the message title that appears after the user successfully submits the form. This is a customizable field, where you can set the title of the confirmation message to suit your site’s tone.
Success Message
The Success Text field allows you to provide a custom message to the user once the form is successfully submitted. This is an important area for creating a personalized experience. You can tailor this message to include further instructions, links to other pages, or additional relevant information.
GDPR Checkbox
For GDPR compliance, you have the option to enable the GDPR checkbox on your form. When this feature is turned on, the user is required to check a box to confirm their consent before submitting their form. A customizable message for the checkbox is provided in the settings, which will appear next to the checkbox. You can adjust this text to suit your specific privacy requirements.
It’s also recommended to link to your Privacy Policy within the GDPR checkbox text, ensuring users can easily access the full details of how their data will be handled.
Email Footer
Lastly, the Email Footer allows you to add legal disclaimers or contact information to your emails. This is a useful feature for displaying important company details, such as your business address or legal disclaimers. For example, the footer can include the company’s address, contact number, and any relevant legal notices or links to those notices, like the privacy policy.